集成指南
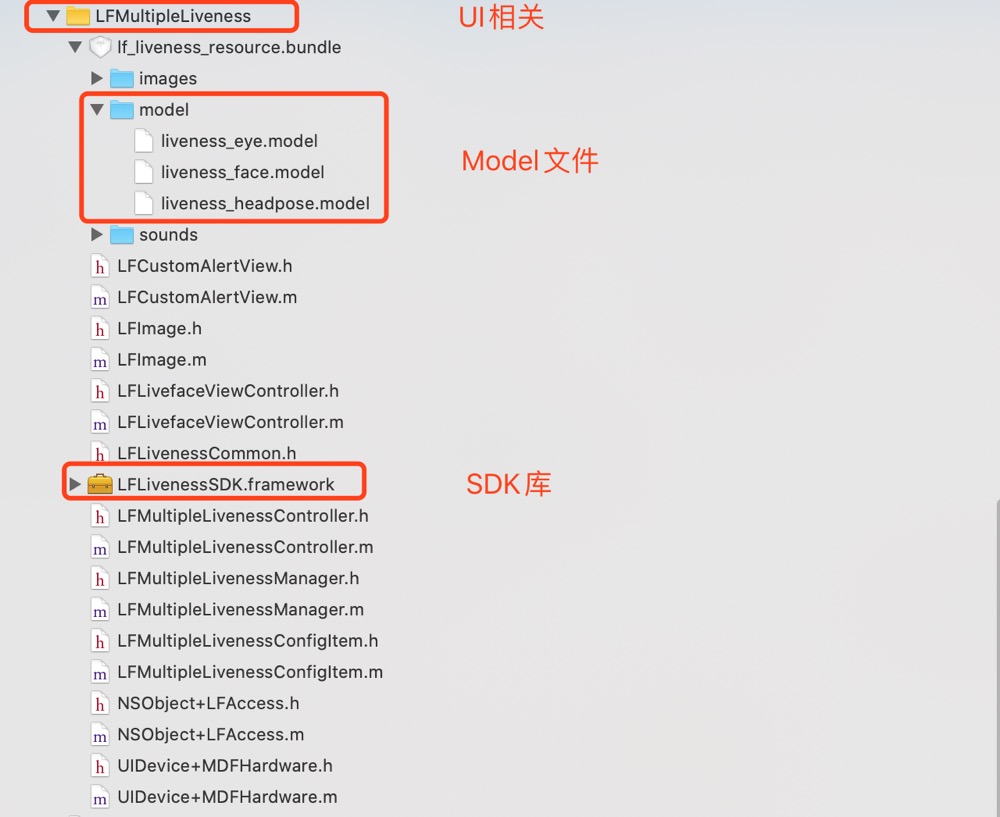
1.SDK目录结构
我们提供的Demo示例结构目录。
2.将SDK集成到开发环境
注意:
使用 SDK 前,首先需要将其集成到您的开发环境中。项目的开发环境需要在 Xcode 6.0版本及以上,运行环境需要 iOS8.0 及以上,下文将说明开发中需要的详细操作。
2.1 配置开发环境
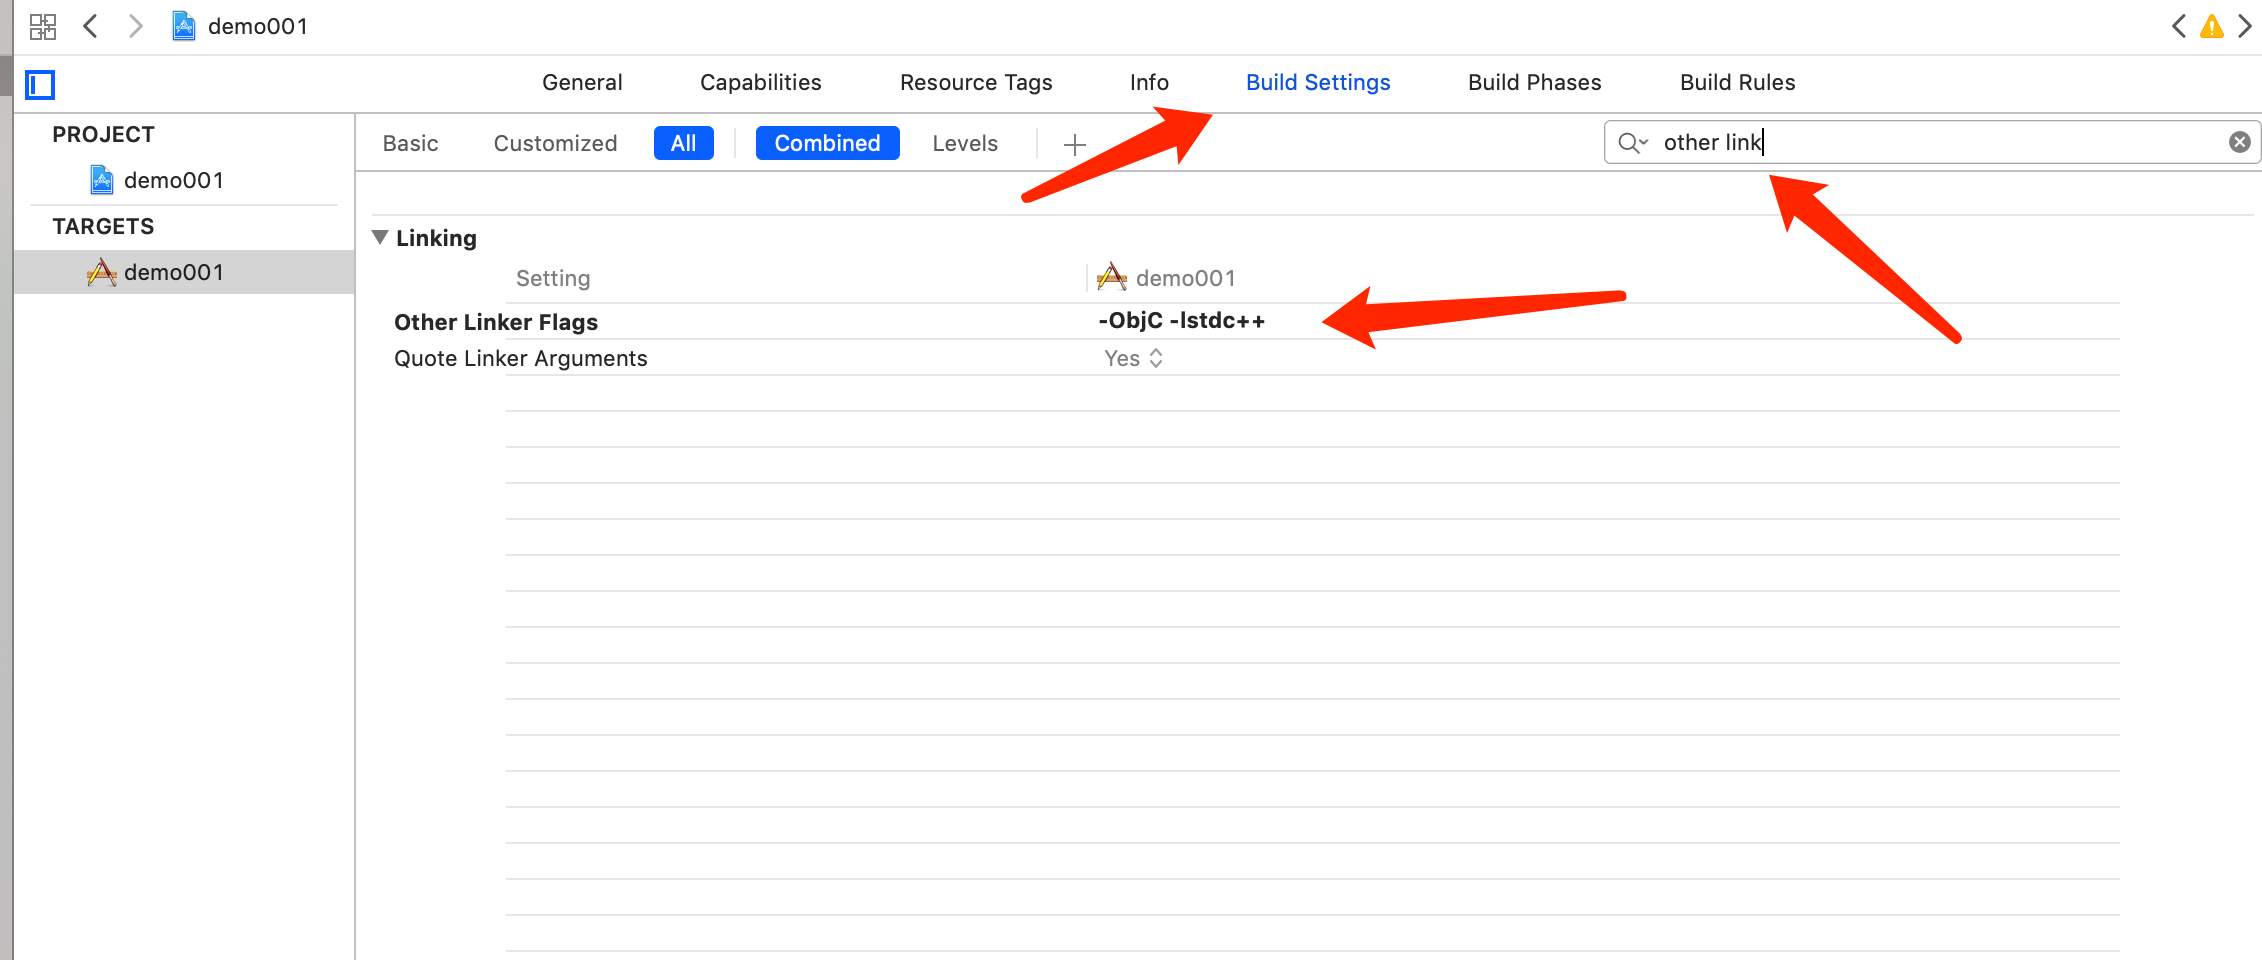
2.1.1 需要添加 Xcode 链接器参数:-ObjC 和 -lstdc++。
添加 -ObjC 参数后链接器可以把静态库中所有的 Objective-C 类和分类都加载到最后的可执行文件中。
添加 -lstdc++ 参数是由于我们的静态库中需要 c++ 标准库支持。
添加方法:
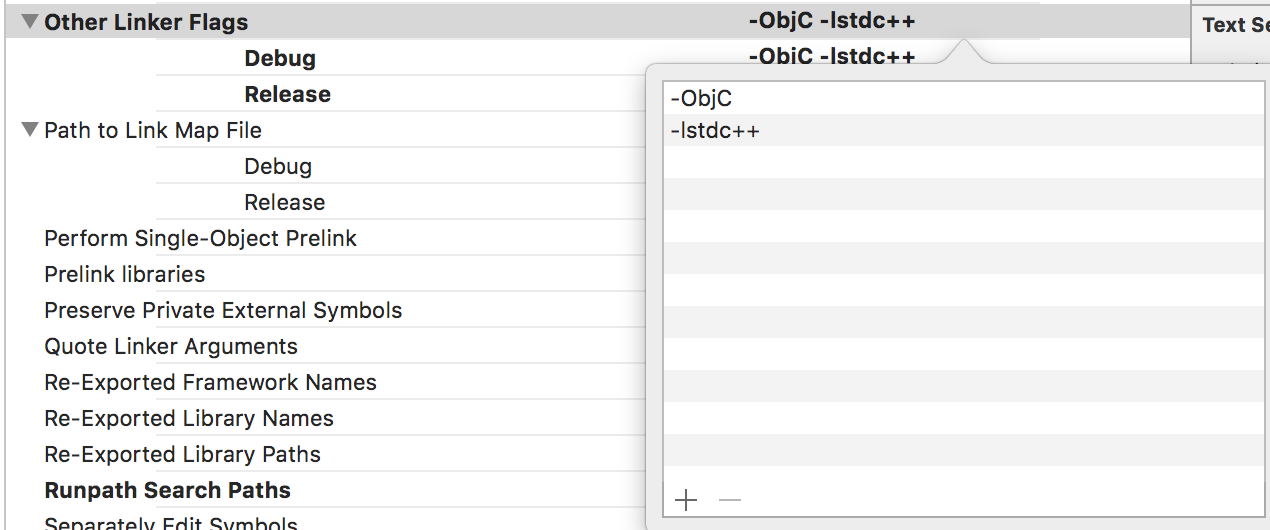
TARGETS -> Build Settings -> Linking -> Other Linker Flags 中添加 -lstdc++ 和 -ObjC 。
2.1.4.在Xcode8上调试iOS10系统时,调用相机功能时,在info.plist文件下添加权限。
需要在info.plist文件下添加相关的权限。
相机权限
<key>NSCameraUsageDescription</key>
<string>cameraDesciption</string
2.2 将SDK集成到项目中
2.2.1 将demo中指定的文件夹(libLFMultipleLiveness)加入到已经配置好环境的xcode项目(以下称项目)中
接下来我们看如何将代码集成到环境中。
3、在项目中创建活体检测按钮
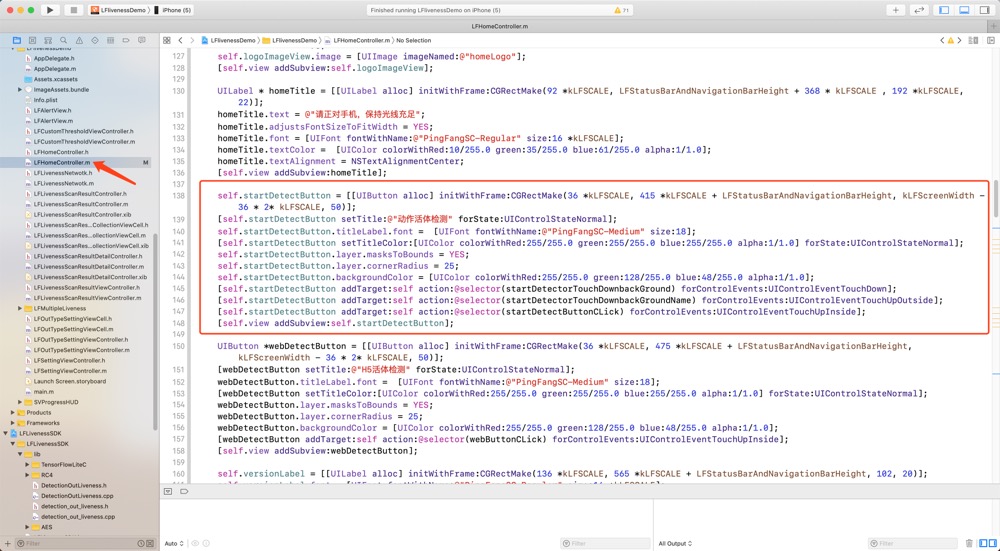
  // 创建按钮开始活体检测
    UIButton *btn = [[UIButton alloc] initWithFrame:CGRectMake(0, 0, 150, 50)];
    [btn setTitle:@"开始活体检测" forState:UIControlStateNormal];
    [btn setTitleColor:[UIColor whiteColor] forState:UIControlStateNormal];
    [btn setBackgroundColor:[UIColor grayColor]];
    [self.view addSubview:btn];
    btn.center = self.view.center;

    [btn addTarget:self action:@selector(btnClick) forControlEvents:UIControlEventTouchUpInside];
5、实现按钮的点击方法,这里在按钮的方法里实现获取token,然后进行基本参数配置和初始化带有UI界面的活体检测控制器。
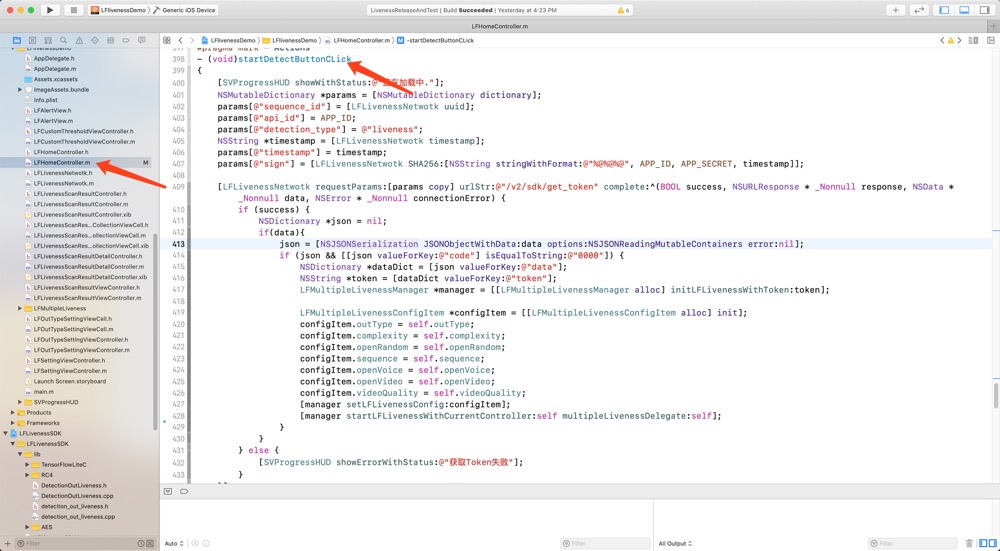
- (void)startDetectButtonCLick
{
    [SVProgressHUD showWithStatus:@"正在加载中."];
    NSMutableDictionary *params = [NSMutableDictionary dictionary];
    params[@"sequence_id"] = [LFLivenessNetwotk uuid];
    params[@"api_id"] = APP_ID;
    params[@"detection_type"] = @"liveness";
    NSString *timestamp = [LFLivenessNetwotk timestamp];
    params[@"timestamp"] = timestamp;
    params[@"sign"] = [LFLivenessNetwotk SHA256:[NSString stringWithFormat:@"%@%@%@", APP_ID, APP_SECRET, timestamp]];

    [LFLivenessNetwotk requestParams:[params copy] urlStr:@"/v2/sdk/get_token" complete:^(BOOL success, NSURLResponse * _Nonnull response, NSData * _Nonnull data, NSError * _Nonnull connectionError) {
        if (success) {
            NSDictionary *json = nil;
            if(data){
                json = [NSJSONSerialization JSONObjectWithData:data options:NSJSONReadingMutableContainers error:nil];
                if (json && [[json valueForKey:@"code"] isEqualToString:@"0000"]) {
                    NSDictionary *dataDict = [json valueForKey:@"data"];
                    NSString *token = [dataDict valueForKey:@"token"];
                    LFMultipleLivenessManager *manager = [[LFMultipleLivenessManager alloc] initLFLivenessWithToken:token];

                    LFMultipleLivenessConfigItem *configItem = [[LFMultipleLivenessConfigItem alloc] init];
                    configItem.outType = self.outType;
                    configItem.complexity = self.complexity;
                    configItem.openRandom = self.openRandom;
                    configItem.sequence = self.sequence;
                    configItem.openVoice = self.openVoice;
                    configItem.openVideo = self.openVideo;
                    configItem.videoQuality = self.videoQuality;
                    [manager setLFLivenessConfig:configItem];
                    [manager startLFLivenessWithCurrentController:self multipleLivenessDelegate:self];
                }
            }
        } else {
            [SVProgressHUD showErrorWithStatus:@"获取Token失败"];
        }
    }];

}
6、实现LFMultipleLivenessDelegate代理方法
在代理方法中有开始回调、成功回调、失败回调、取消回调。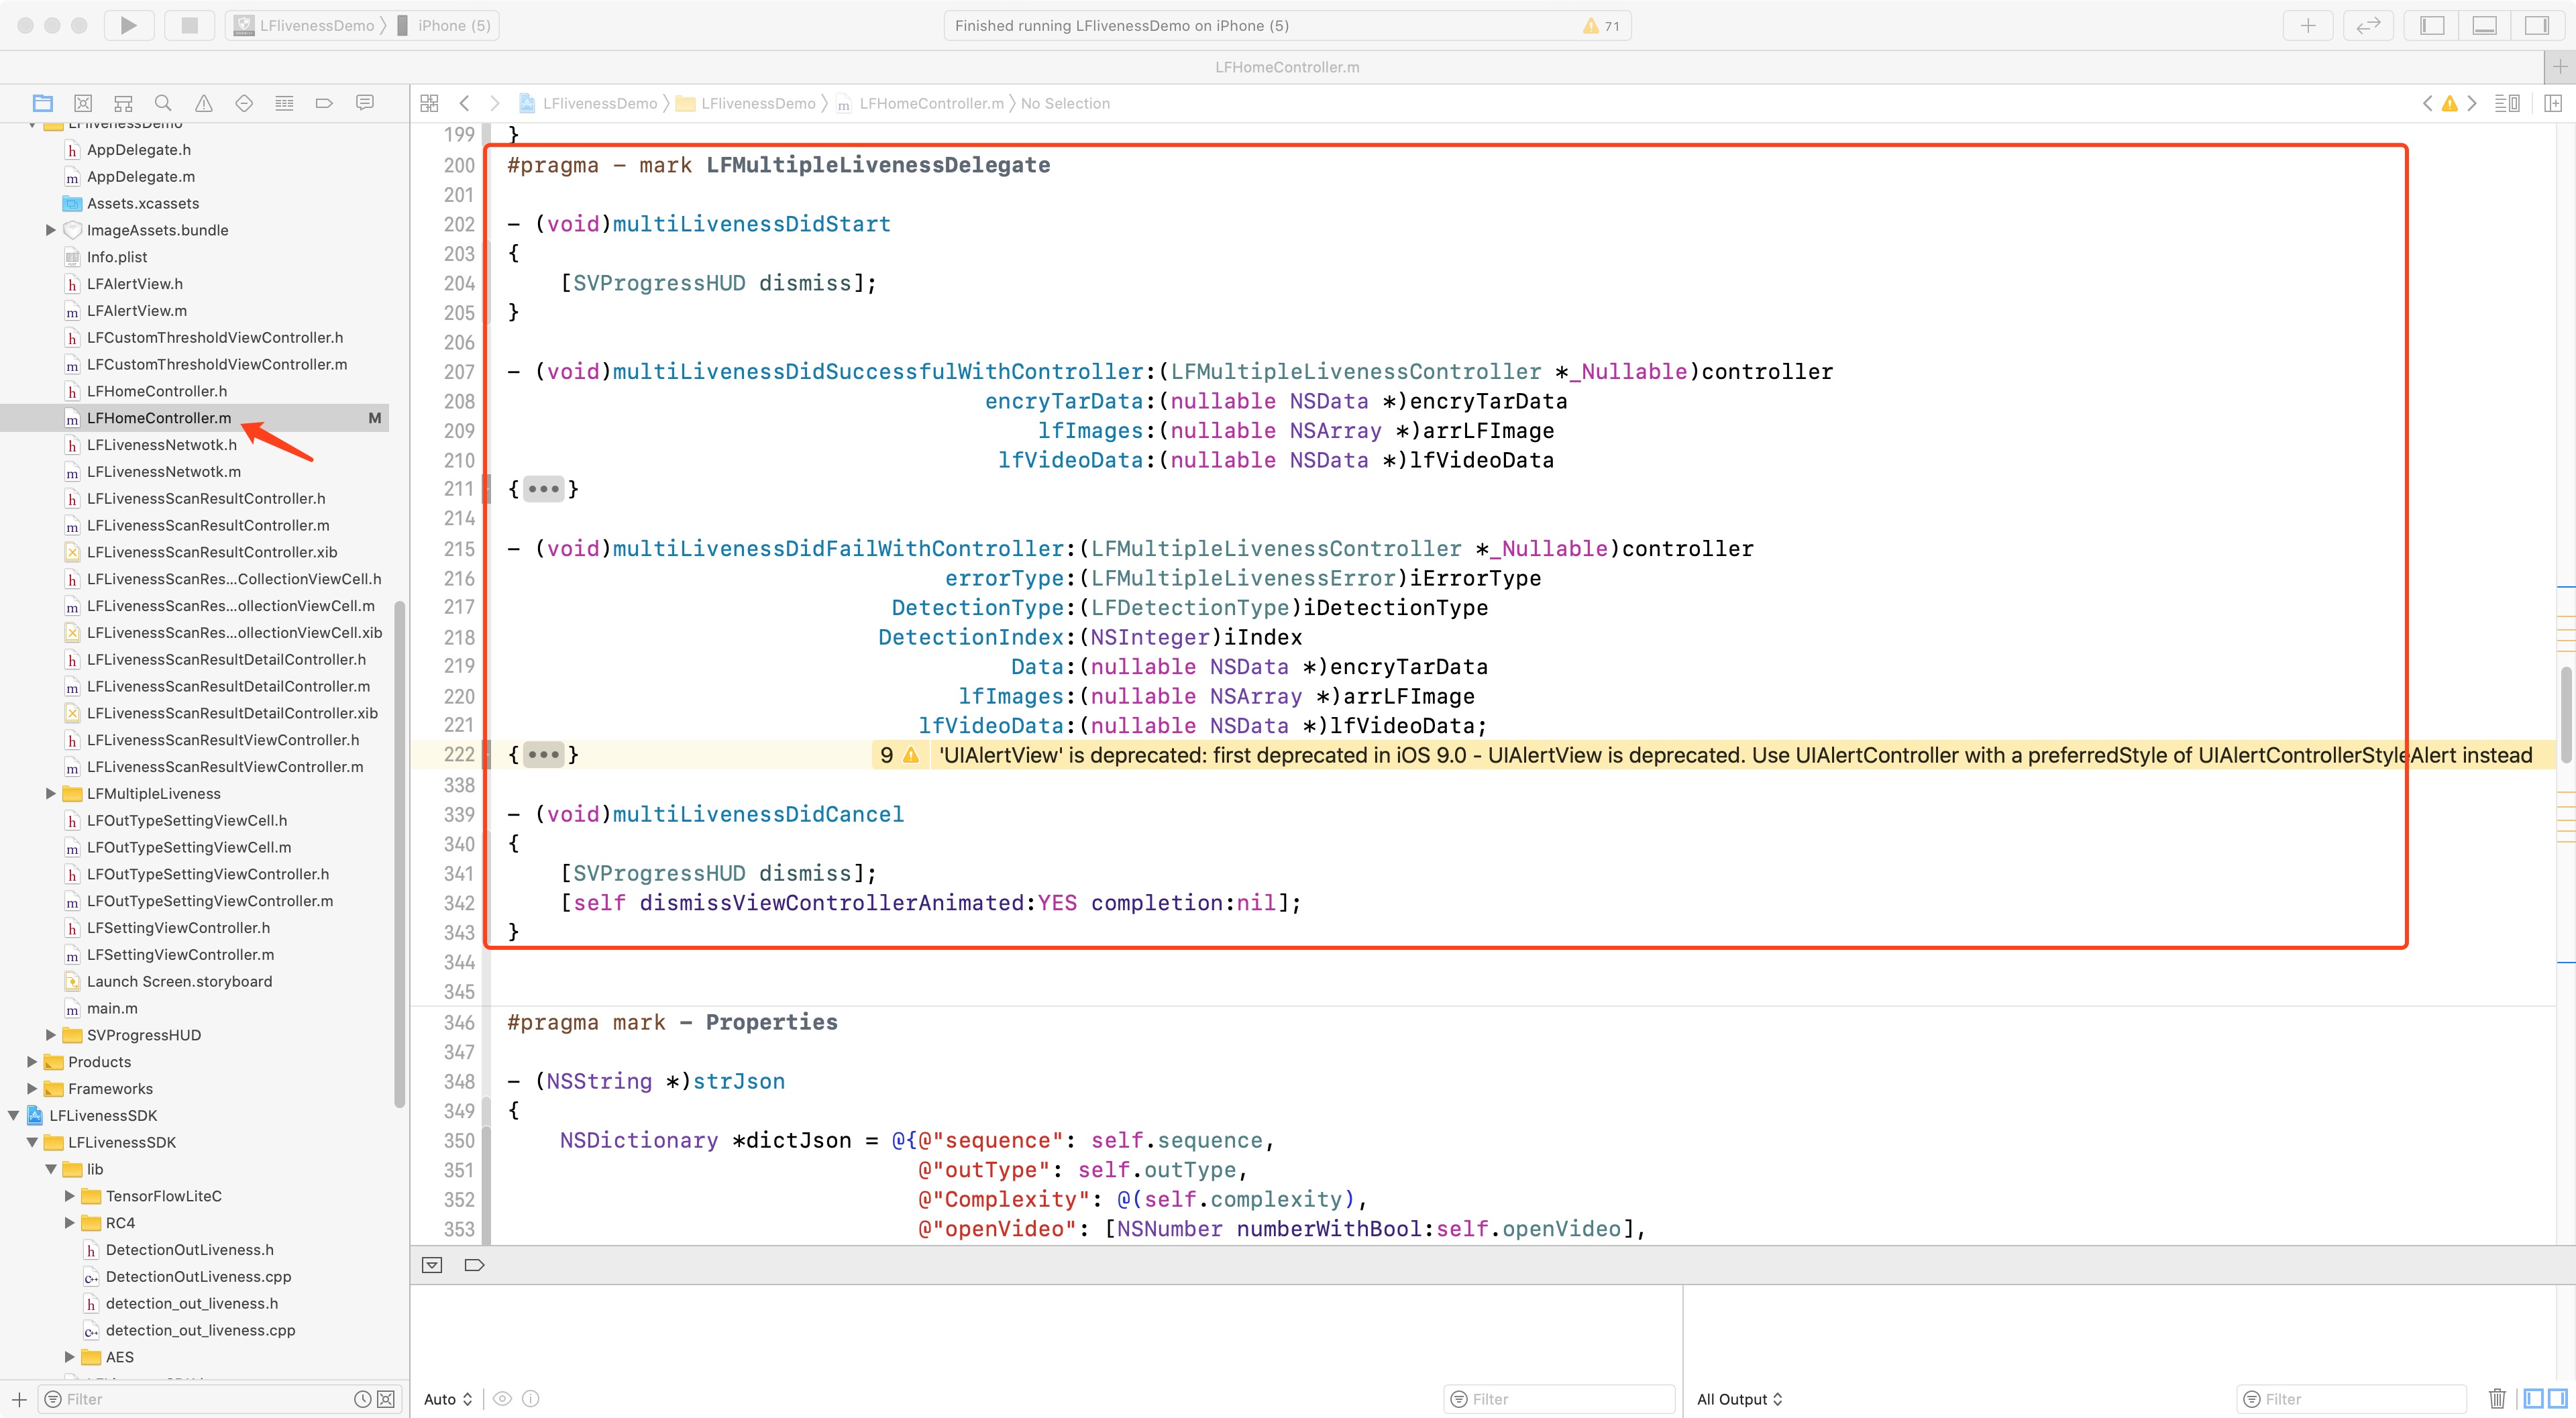 到这里你已经完成把SDK添加入新项目的的全部过程了。如果你想详细的了解实现逻辑请参考我们提供的Demo
文件
到这里你已经完成把SDK添加入新项目的的全部过程了。如果你想详细的了解实现逻辑请参考我们提供的Demo
文件